Step 4: Build the Frame Using the measurements you’ve taken, cut the plywood or MDF to size to create the sides, top, bottom, and shelves of your pantry. Assemble the pieces together using wood screws to create the basic frame.

Step 5: Add Hinges and Magnetic Catches Attach hinges to one side of the frame to allow the pantry to swing open and closed smoothly. Install magnetic catches on the opposite side to keep the pantry securely closed when not in use.
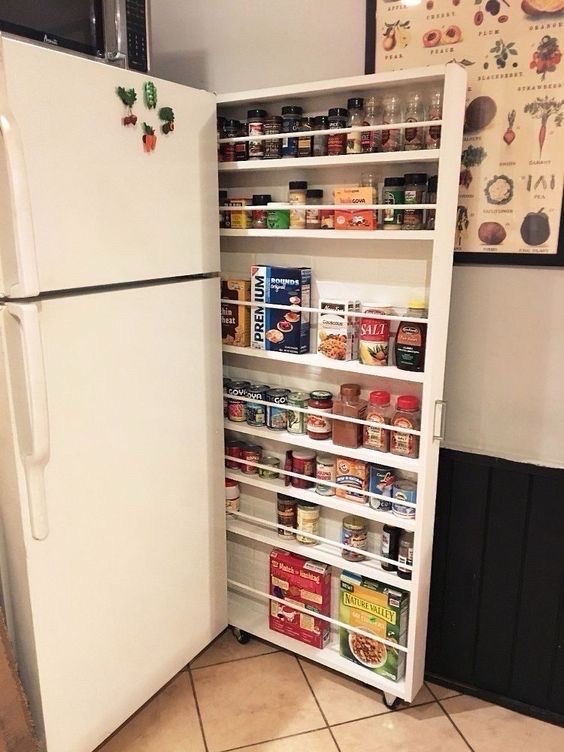
Step 6: Customize the Interior Depending on your storage needs, you can customize the interior of your hide-away pantry with additional shelves, hooks, or baskets. Consider adding hooks or racks on the inside of the door for storing smaller items like spices or utensils.
Step 7: Paint or Stain (Optional) If desired, paint or stain the exterior of the pantry to match your kitchen decor. This step is optional but can help the pantry blend seamlessly into its surroundings.

Step 8: Install Handles or Knobs (Optional) For added convenience, install handles or knobs on the exterior of the pantry to make it easier to open and close.

Step 9: Install in Place Once your hide-away pantry is complete, carefully install it in the chosen location. Use wood screws to secure it to the surrounding walls or cabinets for added stability.

Step 10: Enjoy Your New Storage Solution With your DIY hide-away pantry in place, enjoy the added storage space it provides while keeping your kitchen organized and clutter-free. Use it to store pantry staples, small appliances, or cooking utensils for easy access whenever you need them.

Creating your own DIY hide-away pantry is a fun and practical project that can help maximize storage space in your kitchen. With just a few basic materials and some simple woodworking skills, you can create a custom storage solution that fits seamlessly into your home. So roll up your sleeves, get creative, and enjoy the satisfaction of crafting a functional and stylish addition to your kitchen
